Getting started
Import your asset registry
7 min read
You can bring your whole equipment list into Axiospec in one pass using the Bulk Import tool, which reads a CSV or Excel file, maps your columns to Axiospec fields, and validates every row before anything is saved. If you would rather not touch your data at all, our team can do the migration for you at no cost.
Before you start: prepare your file
Bulk Import reads CSV, TSV, and Excel files (.csv, .tsv, .xlsx, .xls). Export your current registry from your spreadsheet or your existing calibration system, and make sure the first row is a header row that names each column. The importer reads those headers to suggest a mapping, so clear names like Asset Tag, Description, or Serial Number save you work later.
You do not need to rename or reorder anything to match Axiospec exactly. You map columns in the next step, and common names (for example Gage ID, Control Number, Description, or Mfr) are detected automatically. If you would rather start from a known-good layout, open Bulk Import and use Download CSV Template to get a file with the right headers already in place.
- Asset Tag (required): your unique identifier for each instrument, such as CAL-001 or a gage ID
- Instrument Name (required): a short description of the instrument, such as Torque Wrench #12
- Manufacturer, Model Number, and Serial Number: optional but recommended, since serial number helps tell apart identical instruments of the same model
- Location and Site: optional; Site places each asset location under that site, and a blank Site uses your default site
- Calibration Interval: a combined value like 12 Months or 6 Weeks (you can also map separate value and unit columns), plus an optional Last Cal Date
Open Bulk Import and upload your file
Bulk Import lives in the Asset Ledger. From the manager app, go to the Asset Ledger and open Bulk Import, then upload your prepared file.
- Open the Asset Ledger at /manager/asset-ledger.
- Launch Bulk Import. Optionally expand the Formatting Guide or use Download CSV Template first.
- Drag your file onto the upload area, or click to browse and select it.
- Wait while Axiospec reads your column headers. If it cannot find a header row, add one to your file and upload again.
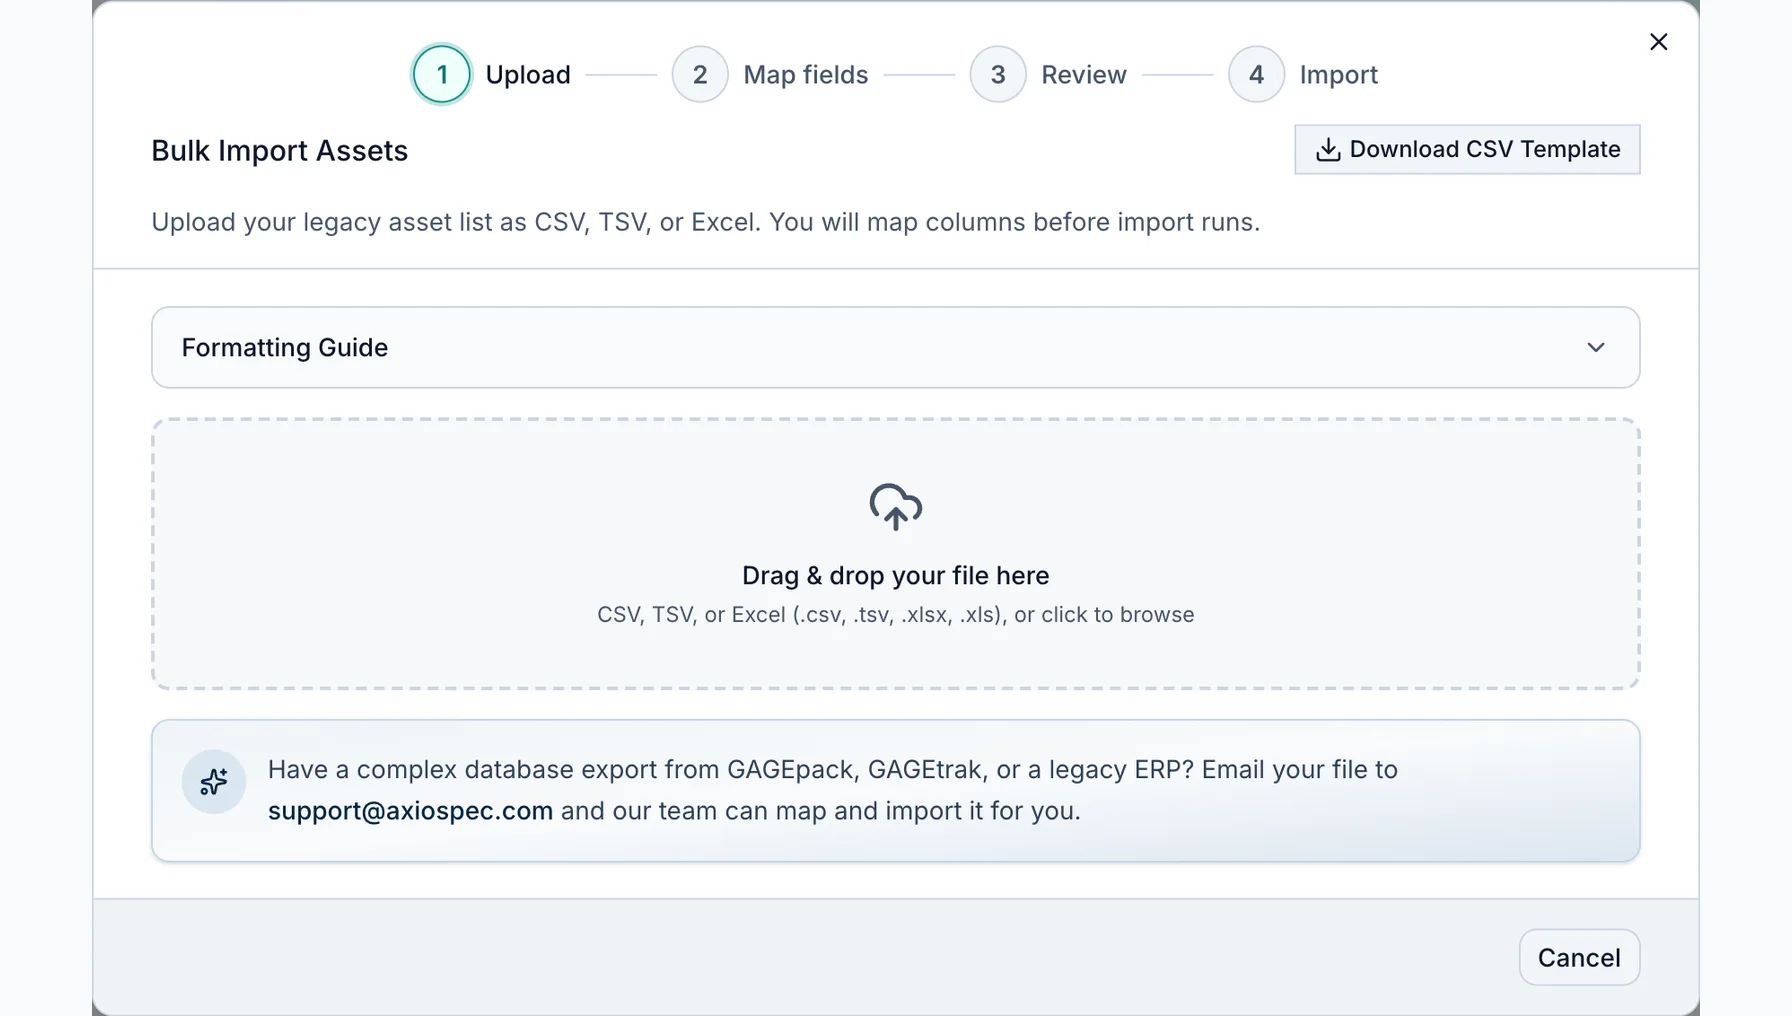
- 1 Download a ready-made CSV template with the columns Axiospec expects.
- 2 Expand the Formatting Guide for accepted date and number formats.
- 3 Drag in your CSV, TSV, or Excel file, or click to browse.
- 4 Large or messy legacy export? Email it and the team maps and imports it for you.
Map your columns to Axiospec fields
After upload, you land on the mapping step. Each Axiospec field is shown as a navy tag on the left, and for each one you pick the matching column from your file on the right. Axiospec pre-fills the obvious matches for you, so often you only need to confirm or adjust a few.
Required fields are marked with an asterisk. You must map Asset Tag and Instrument Name before you can continue. For any column you do not want to bring in, leave the selection on Do not import.
Use Show Advanced System Fields when your interval is split across two columns (a number and a unit), or to map Department and Procedure. Anything else worth keeping, such as purchase date, vendor, or lab ID, can come in through the Custom attributes section, where you choose a file column on the left and name the attribute it becomes on the right.
- Core fields: Asset Tag, Instrument Name, Manufacturer, Model Number, Serial Number, Location, Site, Calibration Interval, Last Cal Date
- Advanced System Fields: separate Interval Value and Interval Unit columns, Department, and Procedure
- Custom attributes: any extra columns you want to carry over, each saved as a named custom field on the asset
Preview and run the import
Select Confirm Mapping to build a preview. Axiospec shows the first rows as they will be saved, using Axiospec field names rather than your original headers, so you can confirm the data landed in the right places before anything is written.
Any previewed row missing a required value (Asset Tag or Instrument Name) is flagged as Missing and highlighted. You can go Back to Mapping to fix the mapping, fix those values in your source file and re-upload, or continue and handle them at the validation step.
When the preview looks right, choose Execute Import. Axiospec validates every row, and the import only commits when the rows pass. Imported instruments appear in your Asset Ledger, ready for you to schedule calibrations and start logging work.
Fix validation errors and import the rest
If some rows fail validation, Axiospec lists each one with its row number, asset tag, and a plain-language description of the problem, often with a hint on how to fix it. Nothing partial is silently saved; you stay in control of what gets committed.
You have a few ways to resolve errors. Use Edit Mapping if a whole column was mapped wrong, or Upload New File after correcting your source. For a quick path forward when only a handful of rows are bad, Skip Errors and Import Valid Assets brings in the good rows and leaves the flagged ones behind (this works for CSV and TSV files).
For larger registries, Download error report exports every flagged row as a CSV with the problem and the suggested fix, so you can correct your source file offline and re-import in one clean pass.
- Edit Mapping: re-point a column that was mapped to the wrong field
- Skip Errors and Import Valid Assets: load the rows that pass and set aside the rest (CSV/TSV)
- Download error report: get a CSV of every failed row, the problem, and how to fix it
- Retry Import or Upload New File: re-run after you have corrected the issues
Add assets one at a time
You do not have to import in bulk. To add a single instrument, go to the Asset Ledger and create a new asset at /manager/asset-ledger/new, or use the Add New Instrument dialog. Enter the asset tag, instrument name, manufacturer, model number, and serial number, optionally set the location and calibration interval, and add a last calibration date if you know it.
This is handy when you receive a new instrument, when you want to try the workflow with one record before importing everything, or when you are filling in details after a bulk import.
Free white-glove migration
If your data is unusual or messy, or you are coming off another calibration system, you do not have to wrangle it yourself. Our team will handle the full migration for free, including moving you off another tool. Most migrations land within a week.
This is especially useful for complex database exports from systems like GAGEpack, GAGEtrak, or a legacy ERP. Email your file to support@axiospec.com and our team will map and import it for you. You can keep using the self-serve Bulk Import tool in the meantime, and switch to white-glove help at any point if a file gives you trouble.
Whichever path you choose, your records land in the same place: a tamper-evident, hash-chained ledger that timestamps and e-signs calibration entries, so the history you build stays traceable and audit-ready.
Put it into practice
Import your asset registry in an afternoon, log every calibration to a tamper-evident audit trail, and produce records on demand. Prefer to see it first? Take a self-guided tour with sample data, no signup required.
Axiospec is a documentation and workflow tool. It helps you keep clean, traceable, audit-ready records; certification depends on your own processes, scope, and assessor.